Mind the Tips, and Other Lessons Learned
I've learned quite a few things while participating in the Sassy Quilter's triangle quilt along. If you've ever been reluctant to sew with triangles, I highly recommend following along. Paula's tutorials and tips are very detailed oriented and easy to follow. Of course I still had some blunders along the way, but that's to be expected. So here's what I've learned so far:
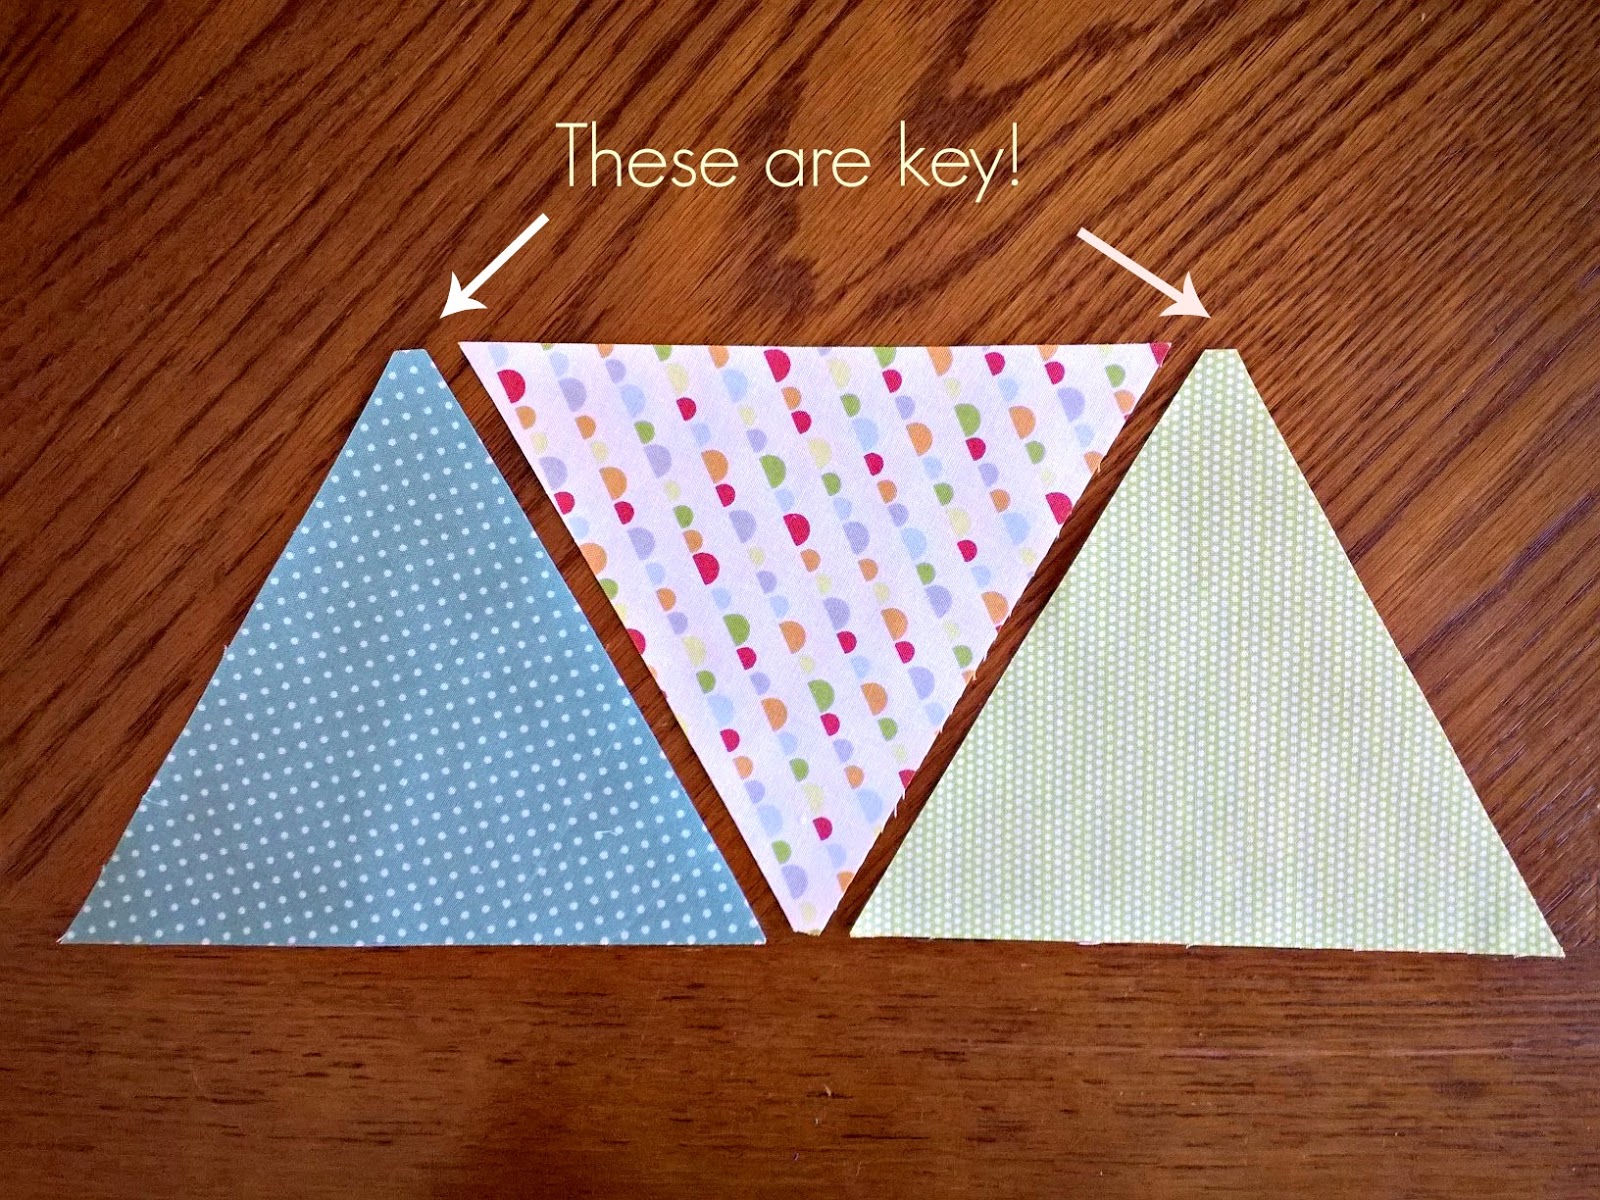
1. Mind the Tips - the tips of the triangles, that is. Paula was very clear on why you snip off the tip of one end on each triangle but I still managed to incorrectly piece together at least 6 pairs of triangles (almost an entire row). If those blunted ends are not at the top and bottom, it's impossible to accurately attach the next triangles.
2. My camera phone has been invaluable in remembering the placement of each triangle. Because these rows are 18 triangles long, I have them laid out on the bed in our guest room. I then have to transfer half a row at a time to be sewn up. Also, when sewing these together it's easy to get them flipped around so it just made sense to photograph each row and refer back to it.
3. No matter how much I try, I just can't keep my cat Oliver from wanting to help me, as evidenced in the picture above.
4. Dealing with triangles (and pieces cut on the bias) aren't as scary as I thought, you just need to use some care and a lot of Best Press.
5. Even with an entire room dedicated to sewing, I still need to use the guest bedroom for overflow. Here's some of the completed rows laid out:


yours look so neat, I did not cut the ends off, naughty should have read the instructions just thought she had a special template!! Mine is only 17 in a row, I expect we join the rows together this week
ReplyDeleteThat will be one pretty quilt when finished! :)
ReplyDeleteBeautifully done! Those tips (or lack of) are very helpful to be sure! This is coming together wonderfully :)
ReplyDelete